ELECTRIC GUITAR CONSTRUCTION A Guide for the First-Time Builder Tom Hirst LIBRO LIUTERIA CHITARRA

ELECTRIC GUITAR CONSTRUCTION. A Guide for the First-Time Builder, Tom Hirst.
LIBRO MANUALE DI LIUTERIA PER COSTRUIRE UN CHITARRA ELETTRICA SOLID BODY.
FOTOGRAFIE A COLORI DI OGNI FASE DI COSTRUZIONE.
168 pagine.
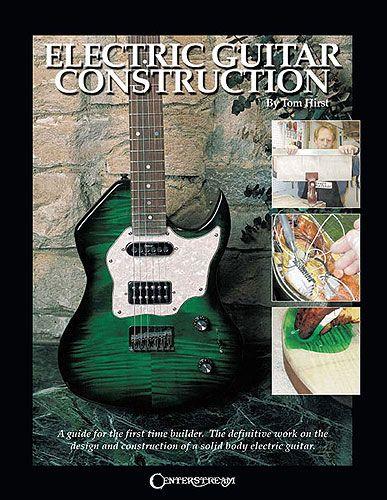
Electric Guitar Construction A Guide for the First-Time Builder. The definitive work on the design and construction of a solid body electric guitar.
Series: Guitar
Publisher: Centerstream Publications
Format: Softcover
Author: Tom Hirst
Q.: What on earth would make someone want to build an electric guitar from scratch? Can't you just buy one cheaper? A.: Well sure, but with this definitive book on the subject as your guide, you can create your own axe masterpiece, with the precise finish, the exact pickups, and the custom hardware you've always wanted. Plus, you'll have the indescribable satisfaction of knowing you created something cool out of nothing. And that sure beats buying off the rack! Organized logically from start to finish, this helpful guide will assist you every step of the way; from the design and planning stage to the final setup, each step in the process is written about in abundant detail, with hundreds of photographs, and special full-color sections on wood selection and finishing. Also includes a glossary of terms, an index of materials suppliers, and much more!
Inventory #HL 00000311
ISBN: 9781574241259
UPC: 073999648119
Width: 8.5"
Length: 11.0"
168 pages
What on Earth would make someone want to build an electric guitar from scratch? Can't you just buy one cheaper? What happens if it doesn't tum out? These questions and many many, more will be asked of you as you plow along through the excitement and anxity of building your first guitar. It does help if you're a little bit different and it's very true that it would be both faster and cheaper to just go buy one off the rack. But it wouldn't be the same one would it? Its fairly safe to assume that spending some time on this project will not be a problem for you. If you need an axe for a gig this weekend you're in the wrong place. You're going to have an investment of approximately $500 in your instrument and there are lots of $500 guitars out there, but how many will have the exact Seymour Duncan or EMG pickups and cusm tom deigned switching you want, the Schaller hard- ware and custom finish; yours will. Your guitar will also have that intangible, indescribable feeling that comes from creating something out of, well I can't say nothing, but you get the picture. Friends and relatives will say you're nuts and that you're wasting your time and money and then they'll want you to build them one too. I started building guitars almost by accident. I wanted a Fender Telecaster so badly, but I just couldn't come up with the money to buy one. I was hanging around in my favorite guitar store one day just being a nuisance when a guy came in with a box of guitar parts. He had a neck, a plywood Tele style body, and two of almost everything else; two pickguards, sets of pickups, bridges, etc. He had taken an el cheapo copy guitar and tried to upgrade it with new parts but nothing had fit where it was supposed to go and he was trying to trade the whole mess in on a new guitar. When the store told him they wouldn't take any of it in trade he asked them where the dumpster was. I politely showed him to the hatchback of my little station wagon and I had my Tele. All I had to do was re-assemble it and make it work. I did, and it did, and I was hooked. A short time later I was reading an article in Guitar Player on hot-rodding guitars and "kit" guitars.
First connect each pickup directly to the jack. Use temporary connections like alligator clips for this. They'll hum a bit for lack of shielding but will tell you if the parts are working right. Remember this technique is for problems with pickups and switches not working, and not for chasing down hum. After you've determined that each pickup works, you can connect them to the next item in the chain. This could be a volume pot, mini toggle switch or the main pickup selector depending on your design. Test the circuit after each part is added to the chain and sooner or later you will run into the problem again, only now you know exactly where it is and you can deal with it specifically. The wiring is complete and I'm tightening in the Electrosocket jack plate. "good solder joint/ bad solder joint" drawings. These can short out against other components or against the shield and cause the switch not to work as expected. in connecting your hot leads. Check your plan and your connections care- full y. Look for stray strands of wire that may not have gone through the solder terminal cleanly as was shown in the I like to plug the guitar in and give it a test before I secure the output jack and the rear cover plate. I have found, on occasion, that the guitar works fine in the test but not after the remaining parts are fastened in place. This can be the result of a wire or component shorting against the shielded cover of the electronics compartment. Sometimes the output jack won't fit well in the access hole when the plug is inserted. Most times this can be corrected by rotating the jack in the hole but I have had to take a 1/2 round file in there and open up the hole to get a good fit. This can be an extremely time consuming process and is not one to undertake when you're in a hurry or a bad mood. If you get frustrated with trying to solve a particular problem, take a break. Let it sit for awhile and come back when you are rested and in a better frame of mind. Remember, this guitar has taken a long time to get to this point and you didn't get here by rushing through all the previous steps. Take your time, be thorough and methodical and you'll find the guilty part(y). Using a mini chisel to clear away excess lacquer from the control cover "lip". There are times when all these good ideas fail and things still just don't work right. This can be a frus- trating time and lots of folks will simply take every- thing apart and try re-wiring it from scratch. Some- times this works, but more often you fall into the same rut and make the same mistake you did originally. My approach in these cases is to re-wire just as you did the drawing; from the pickup on down the line. Well now you have it wired tested and ready to rock. You can go ahead and put the rear cavity cover in place (if you've used one) and screw it down. From here we move on to the fi- nal set up adjust- ments. Wired, tested and ready for the final set up.
Electric Guitar Construction;
A Guide for the First Time
Table of contents:
Introduction:
1. Design:
D-I The importance of planning
D-2 Wood selection
D-3 Neck design
D-4 Body design
D-5 Color selection and hardware
D-6 Electronics
D-7 Pickguard design
D-8 What to buy and when to buy it..
2. Tools and Templates:
T-I List of tools
T-2 Power and hand tool safety
T-3 About templates
T-4 Headstock template
T-5 Body template
T-6 Pickguard and rear cover templates .
T-7 Optional templates .
T-8 Neck profile gauges
T-9 Fretboard radius gauge
3. Neck:
-1 Neck layout .
-2 Truss rod channel
-3 Mark and cut fretboard to length
N-4 Fretboard inlay
N-5 Assemble neck
N-6 Rough cut neck shape
-7 Tuning machine holes
-8 Side dots and rough sanding
-9 Sand inlay
I -10 Install fretwire
-11 Shape neck
-12 Finish sand neck
4. Body:
B-1 The body blank
B-2 Neck pocket
B-3 Necklbody axis
B-4 Bridge placement
B-5 Pickup placement and routing
B-6 Control cavity layout
B-7 Rough cut shape
B-8 Rear cavity rout
B-9 Sand body edges
B-1O Rout body edges
B-Il Input jack, strap buttons & wiring channels
B-12 Finish sand body
5. Plastics:
P-I Mark centerline and outline
P-2 Rough cut shape
P-3 Final fit rear cover
P-4 Rout edges (straight bit)
P-5 Bevel edges
P-6 Rout pickup openings
P-7 Drill mounting screw & control holes
6. Finishing:
F-l About finishing
F-2 Spray equipment
F-3 Clear finishes
F-4 Grain filler
F-5 Applying color
F-6 Applying clear coats
F-7 Wet-Sanding and Buffing
F-8 Finishing schedules
7. Assembly:
A-I Final fretwork
A-2 Rough shape the nut
A-3 Install the hardware
A-4 Neck to body assembly
8. Wiring:
W-I My method
W-2 Equipment and soldering
W-3 Shielding
W-4 Pickups
W-5 Mini switches
W-6 Pickup selectors
W-7 Pots and capacitors
W-8 The output jack
W-9 The complete diagram
W-IOTroubleshooting
9. Set up:
S-l What is a set up?
S-2 Slotting the nut
S-3 Adjusting the truss rod
S-4 Setting string height..
S-5 Setting intonation
S-6 Final adjustments
10. Cost Analysis for this guitar:
11. Index of Suppliers:
12. Glossary:
13. Index: